10 home recording studio essentials – On a budget
So, you have been thinking about it for a while now, and you have finally decided to put together your own home studio. These 10 home recording studio essentials will have you covered.
At the end of this article, I have compiled several lists of great budget equipment to help start your home studio for under $200, Under $500, Under $1000, and under $3000.
10 home recording studio essentials – On a budget
- Computer vs Laptop – Essential
- DAW (Digital Audio Workstation) – Essential
- Headphones – Essential
- Audio Interface
- Microphone – Essential
- Microphone Accessories
- MIDI keyboard
- Studio Monitors
- Studio Desk
- Sound Proofing
Starting your own home recording studio can be quite a daunting and expensive exercise. If you don’t have any previous experience, its super easy to get lost in all the fancy pieces of hardware and software available on the market.
I have been producing music for over 12 years, and over that time I have built and modified my studio, and finally reached a place I am happy with. You will be surprised to know that I don’t have much studio gear at all.
Will your studio be for producing your own music, or do you want to start a recording studio?
Each will require different pieces of equipment.
With that said, let’s dive in and have a look at my 10 home recording studio essentials for beginners.
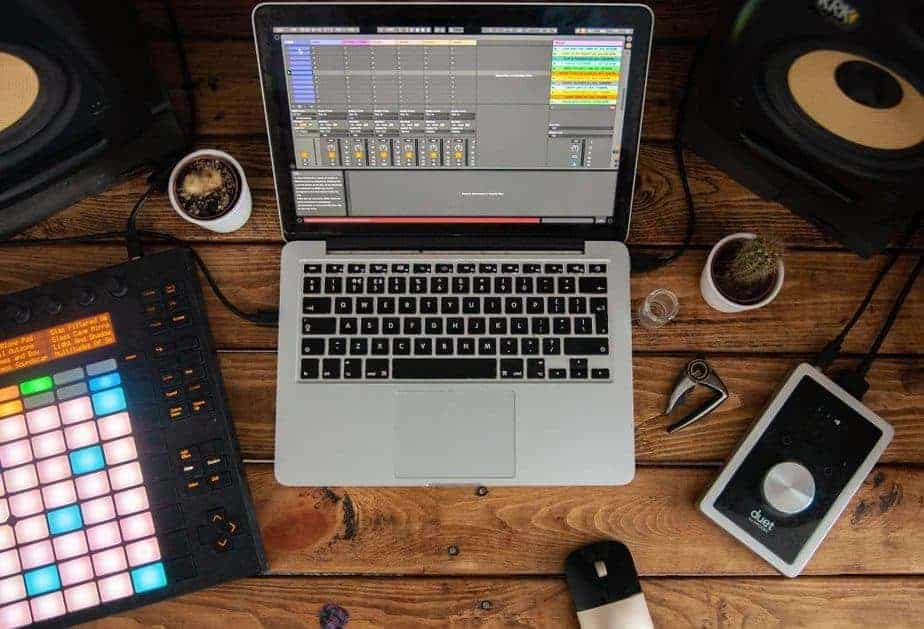
1. Desktop vs Laptop – Home Recording Studio Essentials
A computer. The most important aspect, and definitely one of the home recording studio essentials. Without this item, it’s impossible to have a home recording studio. There are many computers on the market that are great for a home recording studio but I’m not going to list them all.
I personally own an MSI GS65 stealth laptop so I can also edit 4k video footage.
You may already have a desktop computer or laptop at home and that’s great. Most computers are capable of running most DAWS these days.
But if you are in the market and looking for a new desktop or laptop then there are some things to consider:
- Do you want your studio to be portable?
- How much money do you want to spend?
I personally use a laptop because I can take it anywhere. Laptops are generally more expensive than desktop computers. This is because there are engineering feats that make the hardware fit into such a small place.
Desktop computers, on the other hand, have better specs and are significantly cheaper. The higher specs will slightly help your performance but not too much. A downside to this is you can’t take your desktop to a friends or clients house.
Have a think about what will suit you the most and then choose accordingly.
Once you have made your decision its time to figure out what spec computer you require.
Each DAW has different required specifications to smoothly operate, and some are only compatible with windows, and some with mac. We will talk about that in the next section.
Tips:
- If you are also going to be doing video editing, I suggest getting a computer with a good graphics card.
- Before purchasing make sure your favorite DAW can smoothly operate.
- 15” laptop screen is the smallest screen I would personally use.
2. DAW (Digital Audio Workstation) – Home Recording Studio Essentials
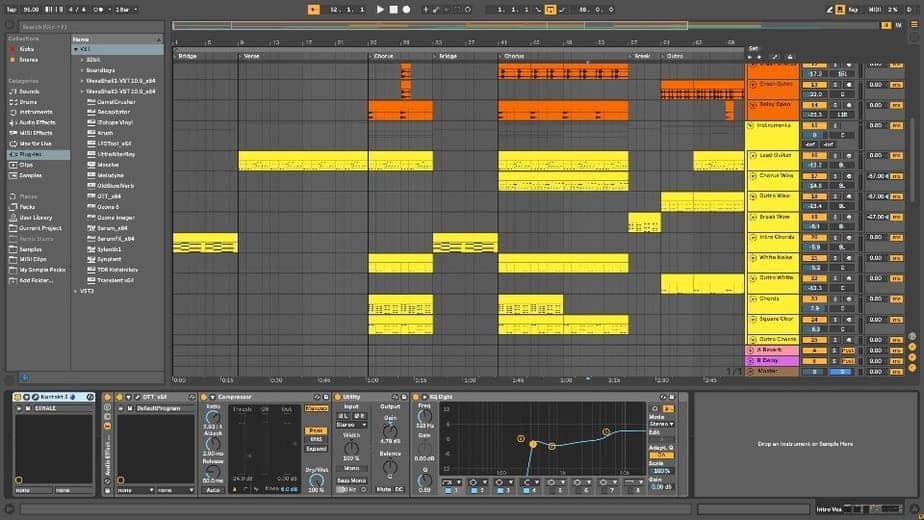
A digital audio workstation is a piece of software that allows you to record and edit all types of audio and MIDI. It’s the place where you record vocals, instruments, edit MIDI, etc.
I suggest you read my other article dedicated to choosing the right DAW for beginners. It has prices, benefits, and links to each official website.
You can find it here: https://www.off-the-beat.com/best-daw-for-beginners/
Regarding a home studio, It’s important to keep in mind what computer you have or what computer you will be purchasing. If you are purchasing a DAW, make sure your computer is capable of running it smoothly.
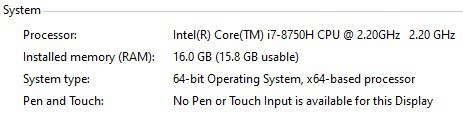
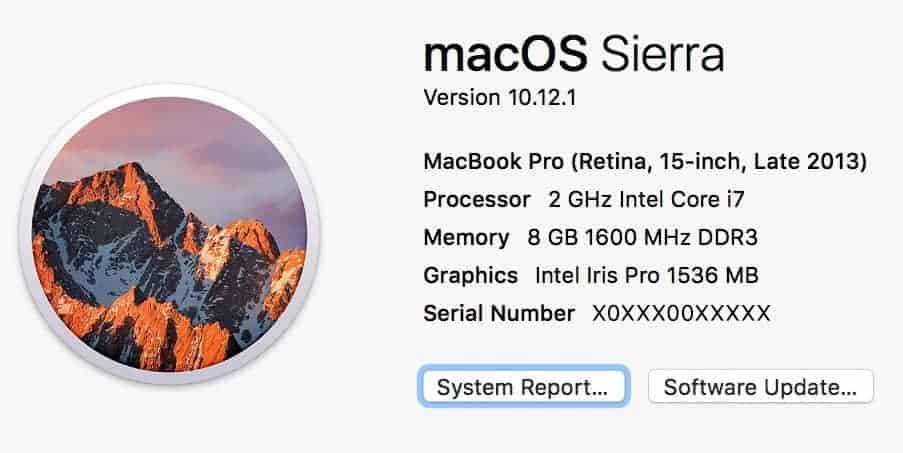
To check your system specs:
- Windows. Right-click on ‘This PC’ or ‘My computer” and click Properties.
- Mac. Click the apple icon in the top left corner, then click about this mac.
Some DAWs are designed for recording audio and others are designed more for the electronic musician. Ask yourself what you will be using it for.
- Will I be using my DAW for voiceovers, narrative recordings, recording live instruments, and vocals?
- Will I be using my DAW for producing electronic music?
- Or will I be using my DAW for Mixing and Mastering?
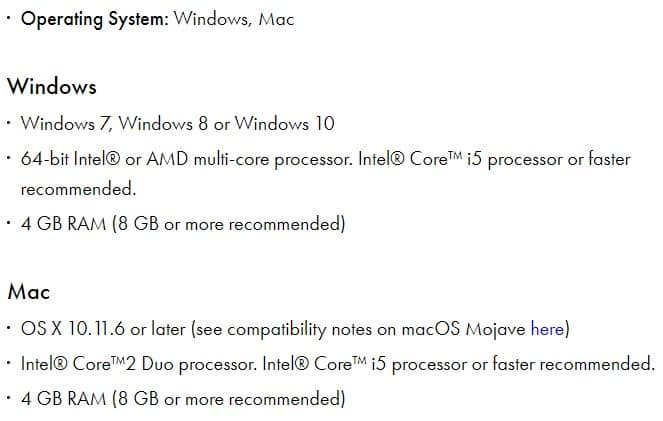
All daws are capable of doing all of these tasks, but some lean more towards a specific purpose. I use Ableton Live 10 and I love it. I can record and edit audio, record and edit MIDI, Mix and master my own songs, and even use it to play live shows.
The top two DAWs I recommend are:
Ableton Live 10 System Requirements
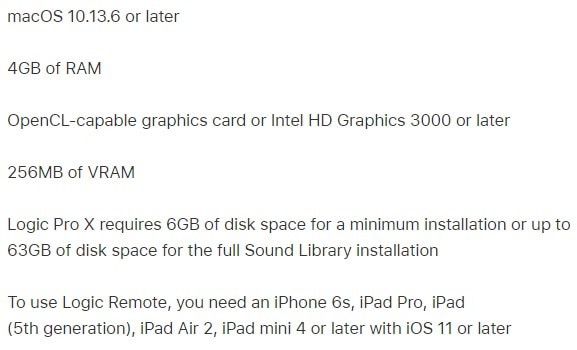
Logic Pro X System Requirements
3. Audio Interface – Optional
An audio interface is a piece of hardware that manages all your audio inputs and outputs. An input is any signal going INTO your devices, such as microphones or instruments, and output is any signal coming OUT of the device such as speakers, headphones, etc.
An interface os not an essential piece of studio equipment, but they do allow for higher quality recording and room for expansion later. They also take some load off your computer.
A few things to consider when purchasing an Audio interface:
- How many microphones will you use at one time? Generally, 2 inputs are enough. If you are wanting to record entire bands or drummers, then you may need to upgrade to 20 inputs.
- How good are its pre-amps? A pre-amp is the electrical component that powers your inputs. Some of these pre-amps generate a slight hiss or static sound that’s difficult to eliminate in post.
- Can it run from phantom power? This means it can run off the 5 volts a USB socket provides. If it’s not phantom power it will need to be plugged into a wall socket.
My Recommendations
4. Headphones – Home Recording Studio Essentials
The chances are you already own a pair of headphones, but they might not be right for your home studio. Headphones are a very important aspect of any studio and crucial to get right.
The most important aspects to consider when choosing the right headphones are:
- Wide frequency range. Every set of headphones has a frequency range that its capable of producing. Some can producer super low frequencies and some can produce higher frequencies. The best headphones for a recording studio are the ones that produce the widest frequency range.
- Well balanced frequencies. Let’s say you record some vocals into your DAW and then play it back through some headphones. It might sound completely different from the original recording. Whys is this? It’s because some frequencies are louder than others thus distorting the sound. A good set of studio headphones will sound like the original recording.
Other factors to consider are:
- Open Back or Closed Back. Open-backed headphones generally have better sound quality, but it comes at a much higher price tag. They are designed to let some of the noise out, but doing so can also let noisy environments in.
Closed-back can still have brilliant sound quality. Lots of people can’t tell the difference between the two. They are much cheaper and a great option if you are trying to reduce environmental sound.
- Detachable cable. Having a detachable cable is also important. The cable is usually the first part to wear and break so if it’s detachable it can easily be replaced.
- Comfort. You will be wearing your headphones for extended periods of time so it’s important to pick a comfortable set of headphones with lots of padding.
How to read a frequency response graph
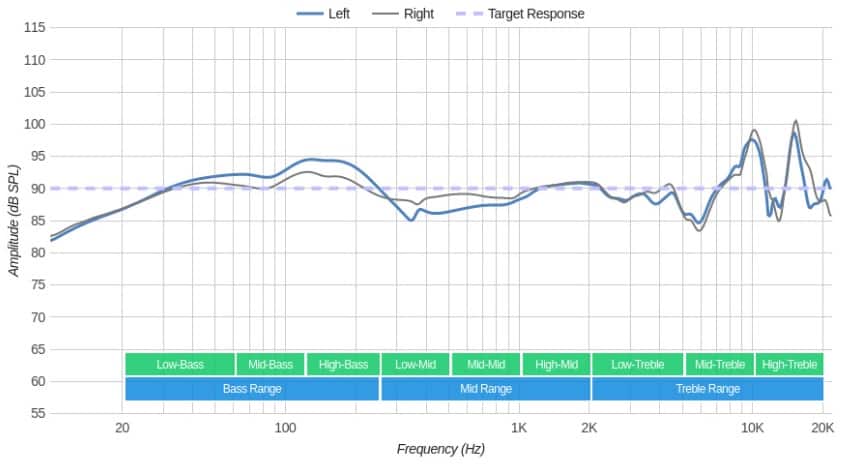
The above picture is a frequency response graph for the Audio Technica ATH M40X headphones. As you can see it consists of 3 colored horizontal lines. The purple dotted line is a perfect frequency balance. All headphones and speakers try and achieve this balance. The other two lines are a representation of the headphone left and right output. We want these other two lines to be as close to the dotted line as possible.
Fun fact: The average human can hear frequencies from 20 to 20,000hz, where a dog can hear up to 45,000hz.
The most important range to consider is the Midrange as that’s what catches the listeners attention the most. Generally, + or – of 10db is acceptable to the average listener. Mixing engineers will be able to easily tell the difference as they have trained themselves to listen for abnormalities.
As you can see, the biggest spikes are +5db volume at 100hz, -5db volume at 400hz, and +10db volume at 10khz.
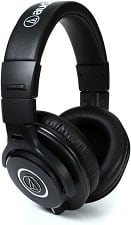
I personally own Audio Technica ATH M40X closed-back headphones and they have served me well over the years. So well, that when they break, I will be getting myself another set.
Things to remember:
- Wide frequency range
- Well balanced frequencies
- Detachable cable
- Comfort
My Recommendations
5. Microphone – Home Recording Studio Essentials
There are so many microphones on the market its so easy to get overwhelmed. It’s ok. Just breathe. I’m here to help you through this process.
USB mic or an XLR mic? Well, that depends on whether you want to purchase an Audio interface or not. XLR mics require an audio interface, Where a USB mic can plug directly into your computer.
As headphones have a Frequency range they can output, microphones have a Frequency range they can input. Just like headphones, the larger the frequency range, and the more balanced frequency range, the better.
The goal here is to get your recordings to sound as lifelike as possible.
All microphones have a cardioid pattern. A cardioid graph shows where the microphones work best and where they pick up their signals from.
Here are the main types of cardioid patterns:
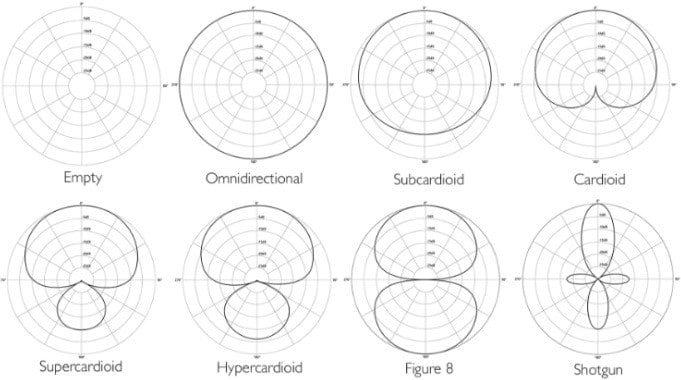
There are 3 main types of microphones:
- Dynamic. Dynamic microphones are the standard mic that your wedding MC uses. They perform well in all conditions and respond well to high-pressure frequencies, meaning it’s hard to distort them. Standard cardioid pattern.
- Condenser. Condenser microphones are a common choice for the home studio. They use a sensitive diaphragm to detect movement in the air from an audio signal. These mics have a very high sound quality but pick up lots of background noise and are susceptible to distortion from loud noises. Figure 8 cardioid pattern.
- Ribbon. These mics are quite old technology and were used mainly in the radio industry. They are less popular now as there are other types of microphones available on the market. They generate a warm vintage sound. Figure 8 cardioid pattern.
There are some other things to consider when purchasing a microphone:
- Will I be recording only in the studio, or will I be field recording?
- Do I want to record in mono or stereo?
If your mic will spend its life in your recording studio then a condenser mic is definitely your best option. But on the other hand, if you want to venture outside into the field, then a wireless portable mic is a far wiser choice.
Portable mics are also great because most are capable of recording in stereo. This means it records 2 signals at once. Left and Right. You can always process stereo into mono, but not the other way around. These mics are a popular choice among music producers because of their versatility.
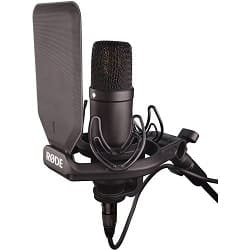
I personally own a Rode NT1 condenser mic and Zoom H5 wireless mic. But if I had to choose one, I would definitely choose the freedom and stereo capabilities of the Zoom H5.
That leads us onto mic accessories.
My Recommendations
6. Microphone Accessories – Home Recording Studio Essentials
Now we have discussed microphones it’s time to discuss the accessories. There are a lot of accessories on the market but there are only a few that one needs in order to get the most out of their microphone.
Some accessories are:
- Mic stand. There are many different types of microphone stands on the market. Some stand from a tripod, some stand from a tripod with a boom arm, and some are small desktop stands. I personally like to use a desktop stand as it’s easy to carry with me and doesn’t take up much room.
- Shock mount. Microphones are so sensitive they pick up vibrations through the mic stands. A shock mount eliminates this problem.
- Isolation shield. This is a sound-treated shield that wraps around that rear of your microphone reducing the noise coming from the back. These are great for home studios where a designated recording booth is not an option.
- Pop filter. When singers sing into a mic, they push air outwards. This moving air hits the diaphragm and causes a temporary pop of distortion in your recording. A pop filter can be placed in front of the microphone to help reduce the distortion.
- Dead cat. If you are going to purchase the Zoom H5, then I suggest you also get yourself a dead cat. This is not an actual dead cat, but a piece of fluffy stuff that looks just like one. It goes on your mic and is used to eliminate wind noise while recording in the field.
All these items are relatively cheap and will make recording in your new studio a much more enjoyable experience.
My Recommendations
7. MIDI Keyboard
MIDI stands for Musical Instrument Digital Interface. It is a piece of hardware that is used to input control signals into your DAW. They can be used to trigger drum sounds, play software synthesizers, or even control effects and automation parameters.
A MIDI controller will only benefit you if you are wanting to produce your own music. If you are planning on just doing voice-overs or starting a recording studio then there is no need for one.
There are many different types of MIDI controllers available but here are the main three:
- Midi keyboard. A MIDI keyboard is a controller that has the typical black and white keys of a piano. They come in many different sizes from travel size 25 keys (30cm long), up to full piano 61 keys (1m long). Some have pitch and modulation wheels, faders, knobs, and drum pads, and some have just the piano keys.
- Drum pads. Drum pads are for those finger drumming fanatics out there. These things can be pretty fun once you get the hang of it. Many have up to 16 pads that you can assign any sample you desire. They can also have a bunch of faders and knobs for extra control.
- Effect controllers. Effect controllers are generally very basic. Usually, they consist of just a few knobs and faders to allow you to control some effects like reverbs, or filters.
I personally own three MIDI controllers:
- Akai MPK25. This one has mini keys and so small it can fit in a small backpack. It only has 25 piano keys and a few extra buttons.
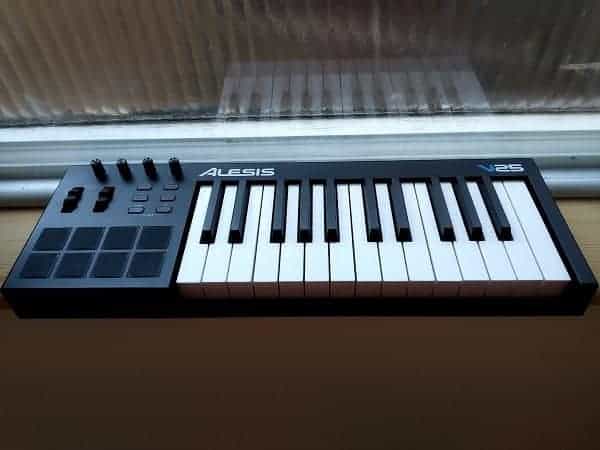
- Alesis V25. This controller has full-size keys so it’s more enjoyable to play. It has 8 drum pads, 4 knobs, and a pitch and modulation wheel. This is my favorite of the 3.
- Axiom 61. The axiom is the largest of the 3 consisting of 61 keys. It has all other functions like knobs, pitch and mod wheels, faders and drum pads. These are a great all-round option for any studio.
Things to consider before purchasing a MIDI controller:
- Will you be making your own music?
- Will you be traveling with it?
- Do you want to finger drum?
My Recommended MIDI Devices
8. Studio Monitors
For those of you who don’t know all the fancy terminology, studio monitors are just speakers. Now, although they are a great piece of equipment to have, they are not really necessary if you are just going to be producing your own music.
I personally don’t own a set of monitors. Instead, I do everything in headphones.
If you are opening a recording studio then I recommend getting some so you and your clients can listen at the same time. But if you are the only one in the studio then they are not necessary.
The most important aspects to consider when choosing studio monitors are:
- Frequency range. Just like headphones, all studio monitors have a frequency range. Once again, the wider the frequency range, the better. But also, the more expensive.
- Frequency balance. The same rules apply as the headphones here too. We are looking for a balanced audio spectrum with as true sound to the original as possible.
- Wattage. Wattage is basically how loud the speaker can go before distorting. The higher the watts, the higher the power needed to run them. A good average wattage to look for is 50-70 watts.
- Ported or closed. Some monitors have a hole in the front or the back of them. These are called ported monitors. They generally have higher sound quality, but if the port is placed too close to a wall, it can give a false reading. Check your studio layout and see if these work best for you.
- Active or Passive. Active monitors require no amplifier as it is built into the unit itself. These are the most popular choice for home recording studios as you need less gear. Passive monitors require an external amplifier.
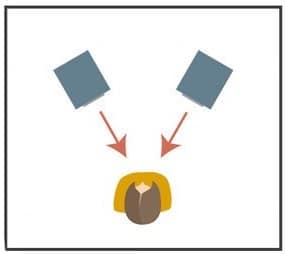
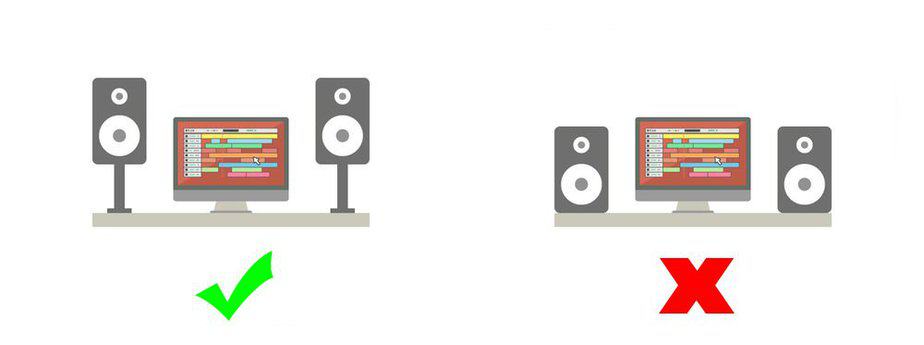
In order to get the most accurate reading from your monitors its important to place them in the right positions. They should be in front of the listener pointing directly to the listener’s head and at head height. The following diagrams show the correct monitor positioning.
My Recommended Monitors
9. Studio Desk
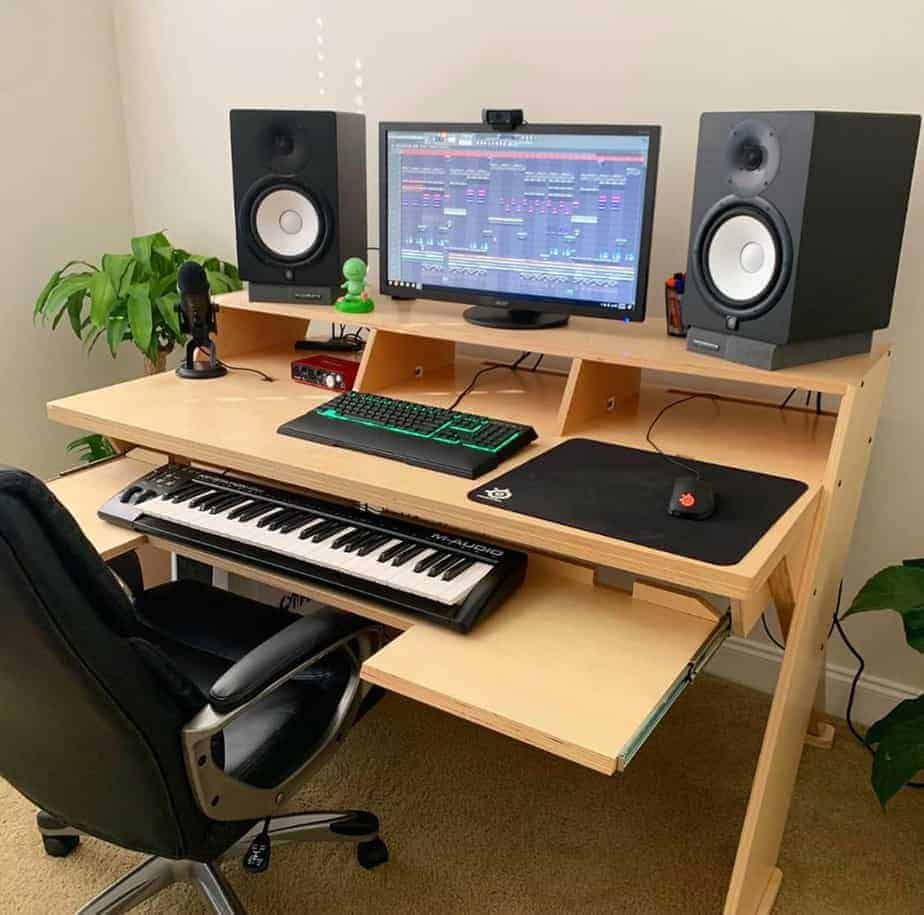
A studio desk can be a piece of gear that makes your time in the studio a lot more enjoyable. A lot of these desks are built in a way that has a specific place for everything to sit, such as your computer, studio monitors, sound card, MIDI keyboard, etc.
They all come with different features and it’s up to you to chose what one works best for your working space.
I recommend something that has a slide-out shelf for your MIDI interface. This makes keeping your space clear so it improves your workflow.
If a studio desk is out of your budget, then a normal table will work fine.\
My recommended Desks
10. Sound Proofing
If you are getting serious about your home studio then you should consider sound treating your room. There is an art to properly sound treating your studio and the trick here is to eliminate as many reflecting sounds as possible.
Sound behaves in certain ways and understanding these behaviors allow us to correctly sound treat our studio.
Sounds that reflect off walls, work their way back to the listener slightly delayed. This is known as reverb.
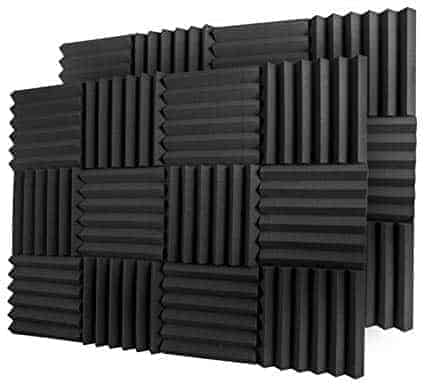
The most common ways to reduce refractions are by treating the correct walls with a sound treating foam sheet. These sheets have many small triangles that absorb the incoming sound rather than reflect it. They are quite cheap so perfect for the beginner studio.
Bass usually builds upon the boundaries of your room. Corners are where most of the low bass frequencies sit. Bass traps can be used in the corners to trap these bass frequencies and stop them from coming back to the listener’s ears.
Summary
I recommend getting a piece of paper and sketching out your studio. Measure your room size, mark doors, windows, and Powerpoints and begin to plan the layout. Once you have a general idea you can begin the hunt for the perfect equipment.
Below I have compiles a few lists of studio equipment to help you get an idea of what you will get for your budget.
Budget home recording studio essentials for under $200
- Computer
- DAW – Ableton Intro
- Headphones – Audio Technica M40X
Budget home recording studio essentials for under $500
- Computer
- DAW – Ableton Intro
- Headphones – Audio Technica ATH m40x
- Microphone – Audio Technica AT2020 USB
- Microphone accessories – Desktop microphone stand
- MIDI Device – Novation Launchkey Mini MK3
Home recording studio essentials for under $1000
- Computer
- DAW – Ableton Standard
- Headphones – Audio Technica ATH m50x
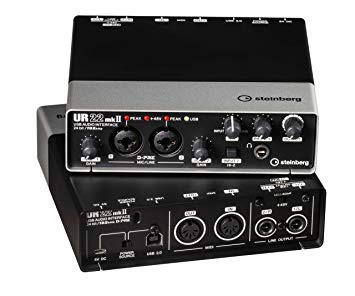
- Audio Interface – Steinberg UR22C
- Microphone – Audio Technica AT2020
- Microphone accessories – Freestanding microphone stand, Shock Mount
- Studio monitors – M-Audio AV42
Home recording studio essentials for under $3000
- Computer
- DAW – Ableton Suite
- Headphones – Audio Technica ATH m50x
- Audio Interface – Universal Apollo Twin MK2 Duo
- Microphone – Rode NT1
- Microphone accessories – Freestanding microphone stand, Isolation Shield
- MIDI Device – M-Audio Axiom 61
- Studio monitors – KRK Rokit Monitors
- Studio Desk – On-Stage WS7500
In my opinion, simple is always better. It’s easy to get lost in all the cool tech out there and forget about the important things.
Good luck and happy producing.