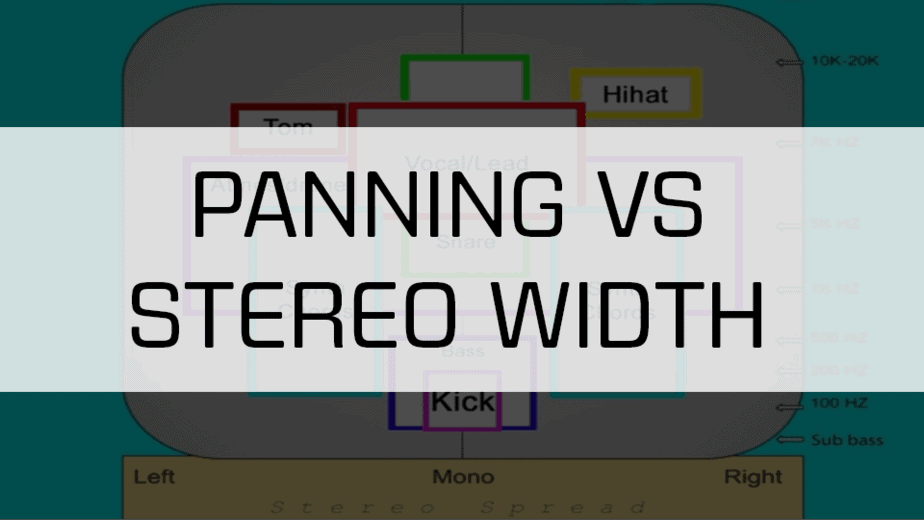
Panning vs Stereo Width for Beginners
Panning vs Stereo width. They are different but also much the same. Once you understand the difference you can then use them to make your tracks shine and come to life.
Generally, panning is pushing a sound to the left or right of the mix to create room down the middle for more important elements like vocals or leads. Whereas stereo width is how wide a sound feels. If it sounds like it’s coming from both sides at the same time, then it has a wide stereo width. Panning can be used to help give your overall mix stereo width.
What is the difference?
- Panning. As mentioned earlier, panning is the act of pushing a sound to one side. You can choose how far to the side you want to push it. There are general rules regarding what elements you should pan and how far to pan them. We will talk more about that later.
- Stereo Width. Stereo width is a little different. As panning is the act of pushing a sound to one side, Stereo width is pushing both sides of a sound farther to the sides. This makes the sound feel bigger and fuller. We will talk more in-depth about this next.
Where to use panning and stereo width?
I don’t want to tell you to follow these rules, because sometimes rules can limit your creativity, but there are some general rules to keep in mind when panning or adding stereo width.
What elements should you pan?
How far should you pan them?
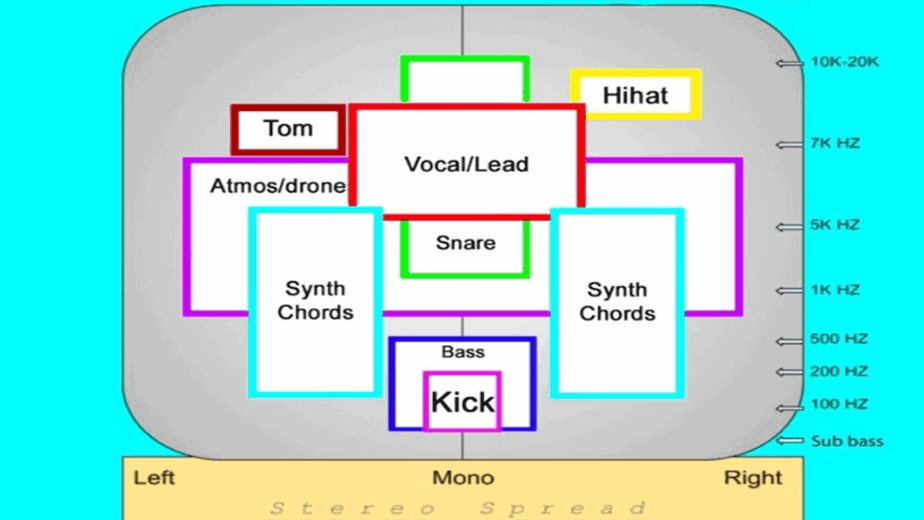
Generally, the bass, lead, guitar, and vocal elements will be in mono and sit in the middle of the mix. Anything that sits in the middle will be the focus of your listener. All other elements should be panned or widened so the mono elements have room to breathe.
The image below is a visual representation of where your elements should sit in your mix. The centerline in the middle of your mix and in mono. All other elements can be seen as getting wider and wider.
How to pan a sound?
Panning your desired sound is quite easy. Most DAWs have a knob on each track that has a ‘Left’ or ‘Right’ setting. Turn the knob to the desired side slowly and you will hear the sound gets pushed further and further to the side.
Ableton can be panned 50 left or 50 right. The higher the number the more the sound is pushed to the side.
How to add stereo width to your mix?
There are many ways to add stereo width to a sound. They all achieve slightly different results. You can choose to use them all at once, or one at a time. Let’s look at a few.
- Voice and detune your synth

If you are wanting to make a synth part feel wider you can add more voices and then slightly detune them. Just say you want to add 7 voices, this will create 7 more layers of that sound and play them simultaneously. We can then detune each layer slightly, so they are a little bit different from each other. This results in a much wider and fuller sound.
- Add delay effect
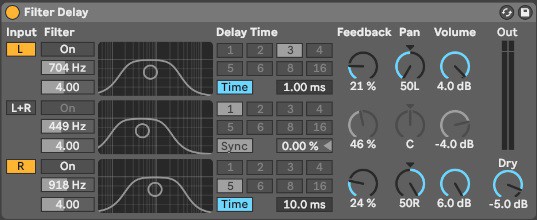
Sometimes we don’t have the option to add voices. If we want to make a guitar or backing vocals feel wider, there are some things we can do. Most DAWs come with built-in delay effects. These delay effects usually have the option to process the left, middle and right sides differently.
Ableton comes with the ‘Filter Delay’ and this works perfectly for adding stereo width. Disable the middle and only leave the left and right side activated. You can then turn off sync mode and lower the delay of one side to ‘1.0ms’. This results in one side playing slightly slower than the other side, resulting in a wider feel.
- Use hard panning

Hard panning as another way to add stereo width to a sound. Duplicate your sound so you have a total of 3 of the same sound. Pan one hard left one hard right and leave one in the middle.
Then slightly change the left and right tracks so they are all different from each other. You can delay one from the other, add more detuning to one, or even change volume levels slightly.
This will allow your ears to notice slight differences from each side tricking you into believing the sound is much wider than it is.
- Use third-party stereo imagers
There are many third-party stereo imagers out there that are great for giving sounds more stereo width. Most of them will show you a visual representation of your stereo image.
Free plugins for adding width
- Ozone Imager 2
Probably one of the best free stereo imagers on the market. It has a beautiful visual representation of your sound and only has two faders making is super easy to use. It can also be used to turn a sound completely to mono or to turn a mono sound into stereo.
Read more about Ozone Imager 2 HERE.
- Voxengo Stereo Touch
Still, a great plugin but lacks the visual representation of your stereo image. Uses delays to add stereo width to your sound.
- Infected Mushroom Polyverse Wider
Another great stereo imager. It’s super easy to use with only one setting to make things wide or wider. It also doesn’t come with a visual representation but can be paired with ozone imager 2 so you get the visual representation.
Tips
- When panning sounds to one side, remove all sub and bass frequencies using an EQ low cut. This will allow you to keep the sides of your mix sounding clean.
- When adding stereo width, you can also try removing the sub and bass frequencies using an EQ set to ‘M/S’. M = Middle, S = Side. Click the ‘S’ button and low cut out the unwanted frequencies.
- After making your sound wider, add an EQ and remove some frequencies in the middle to create room for your lead or vocals.
- Try using all these techniques at once and see what interesting sound you can come up with.
Summary
As I mentioned earlier, there are some general rules/tips to follow when adding your panning and stereo width. Use these as guidelines, but don’t forget to experiment and learn new things. These techniques are things that I have learned over the years and use them daily.
I hope this has helped you understand the difference between Panning vs Stereo Width.
Good luck and happy producing.